Contents
Recording & Playback
Configure recording schedules, storage settings, and review recorded footage.
Recording Overview
Kalytera records video using H.264/H.265 passthrough — the camera's original stream is copied directly to disk without re-encoding. This delivers minimal CPU usage, no quality loss, and accurate timeline playback. Recordings are stored in short tamper-resistant segments.
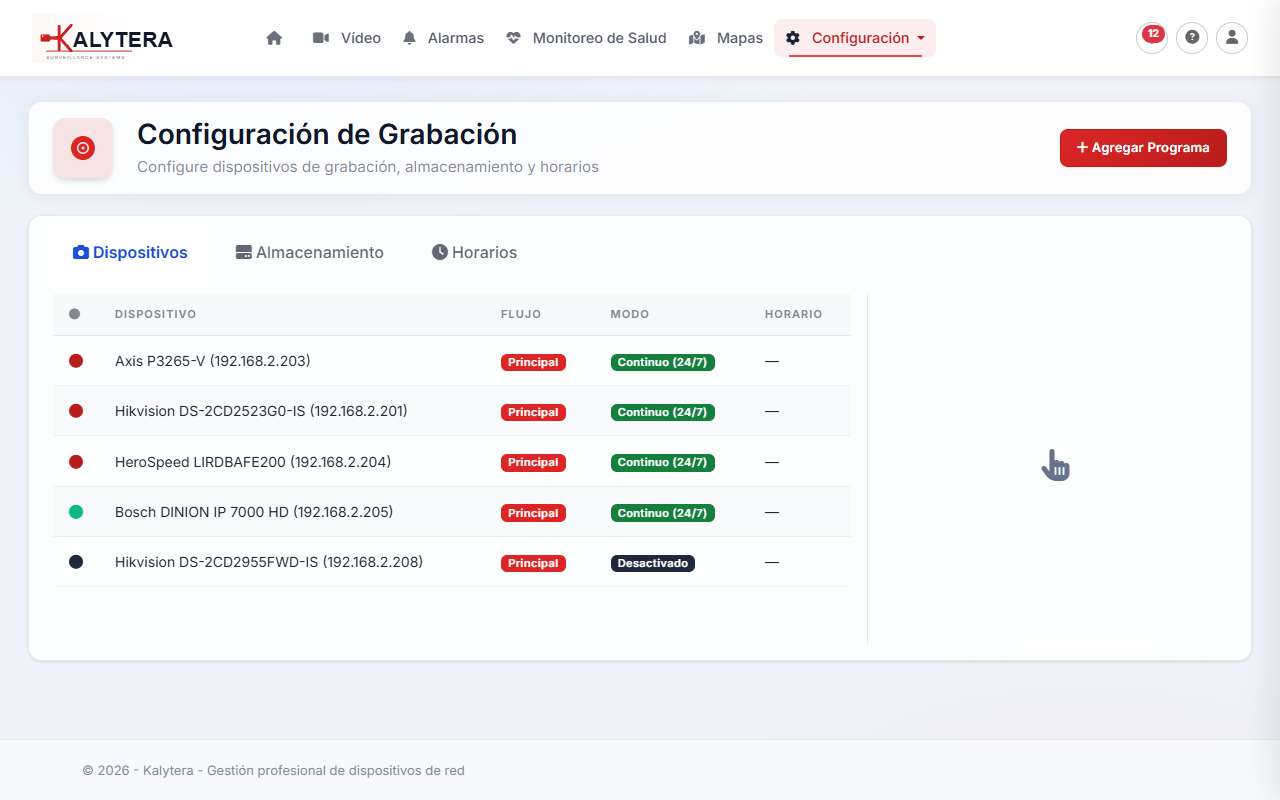
Configure recording at Setup → Recording. The page has three tabs: Devices, Storage, and Schedules.
Recording Types
Each camera can be configured independently with one of four recording modes:
| Mode | Description | Best For |
|---|---|---|
| Continuous | Records 24/7 without interruption. | Critical areas requiring full coverage at all times. |
| Scheduled | Records only during defined time windows (e.g., business hours). | Reducing storage while keeping coverage during active periods. |
| Motion | Records when motion is detected, with configurable pre/post-event buffers. | Minimizing storage in low-activity areas. |
| Disabled | No automatic recording. Operators can start manual recordings on demand. | Reference cameras, temporary disablement. |
Recording Schedules
Create named schedules to control when cameras record in Scheduled mode:
- Go to Setup → Recording and open the Schedules tab.
- Click Add Schedule.
- Enter a name (e.g., Business Hours), select the days of the week, and set start and end times.
- Click Save.
- Assign the schedule to one or more cameras in the Devices tab by setting the recording mode to Scheduled and selecting the schedule.
Multiple schedules can be created and reused across any number of cameras.
Storage Settings
Go to the Storage tab in Setup → Recording to configure:
- Recording Path: The folder where recordings are stored. Choose a drive with adequate free space (see System Requirements).
- Maximum Storage: A hard limit in GB. When the limit is reached, the oldest recordings are automatically deleted to make room for new ones (circular buffer behavior).
- Retention Period: Alternatively, set a maximum age in days for recordings. Recordings older than the threshold are deleted by the retention background job.
Do not set the recording path to the same drive as Windows (typically C:\). Use a dedicated data drive or NAS share. A full system drive will cause recording failures and can destabilize the OS.
Per-Device Recording Configuration
In the Devices tab of Setup → Recording, you can configure each camera individually:
- Recording Mode: Continuous, Scheduled, Motion, or Disabled.
- Pre-event Buffer (Motion mode): How many seconds before a motion event to include in the recording.
- Post-event Buffer (Motion mode): How many seconds after motion stops to continue recording.
- Schedule Assignment (Scheduled mode): Which schedule to use.
- Stream: Main stream (default, higher resolution) or substream for recording.
Playback
Navigate to Video → Playback (or use Video → Live and click the Playback tab) to review recorded footage.
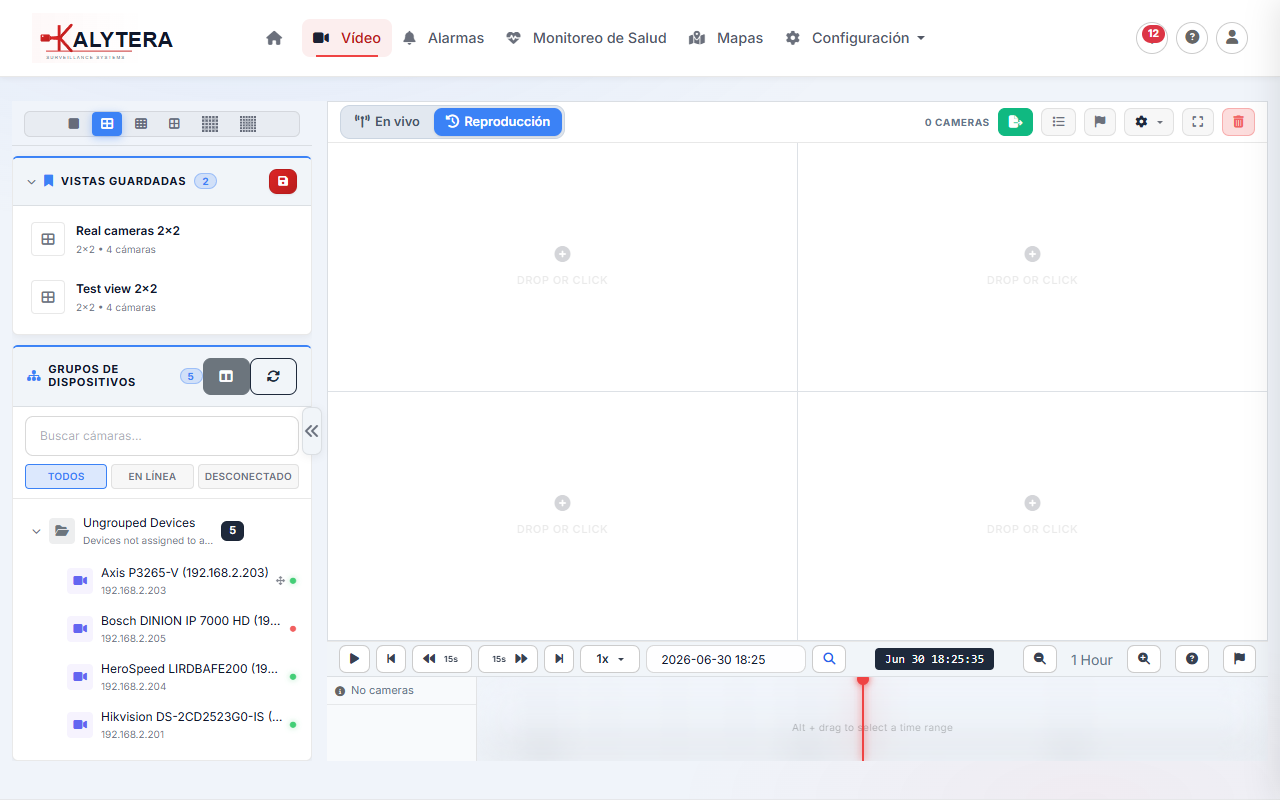
The playback interface shows:
- Camera cell: Shows the selected camera's recording for the chosen time range.
- Timeline: A horizontal scrollable timeline showing when recordings exist (blue bars). Click any segment to start playback at that point.
- Playback controls: Play/pause, step forward/back, speed control (0.5× to 8×), and seek by entering a date/time.
- Date picker: Jump to any date to view recordings for that day.
Export to MP4
To export a clip as an MP4 file:
- In Playback, navigate to the start of the clip you want to export.
- Click Export in the toolbar.
- Set the start time and end time for the clip. Keep exports under 2 hours per clip for manageable file sizes.
- Click Start Export.
- Exports appear in Video → Exports. Download the completed MP4 from there.
Exports run as background jobs — you don't need to keep the page open. Check Video → Exports when the export finishes to download the file.
Troubleshooting Playback
- No recordings appear on the timeline: Confirm the camera's recording mode is not Disabled, and that the storage path is accessible and has free space.
- Playback starts but stalls: This can occur when a recording segment is incomplete. The player will resume at the next available segment automatically within a few seconds.
- Export takes too long: Large exports (multiple hours) may take several minutes. Check the export progress in Video → Exports.
- "No recordings found" for a known-good camera: Verify the recording path in Setup → Recording → Storage is correctly set and the drive is mounted.