Contents
Live Viewing
Monitor cameras in real time using Kalytera's multi-camera live view grid.
Overview
The Live View page provides real-time monitoring of all your cameras. It supports up to 36 simultaneous camera streams (6×6 grid), drag-and-drop camera assignment, saved views, and PTZ control.
Access Live View from Video → Live in the top navigation.
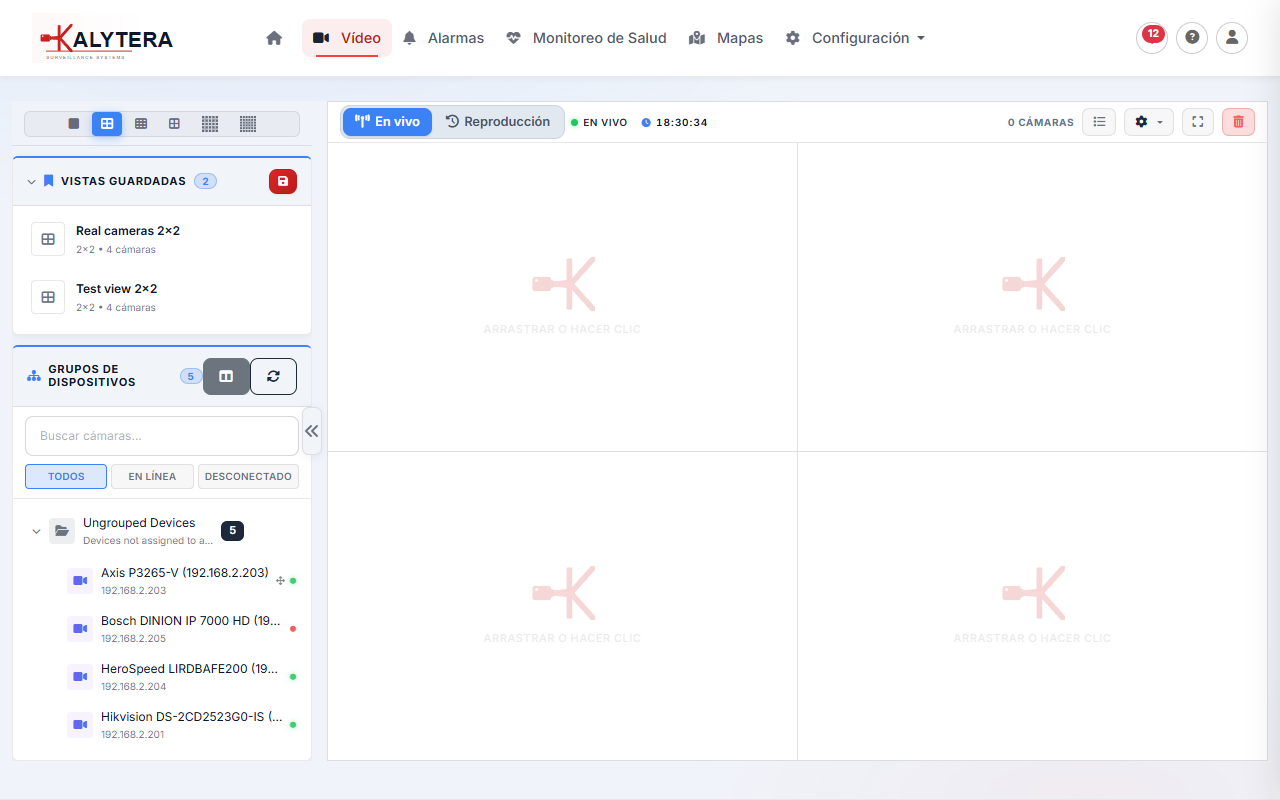
Grid Layouts
Use the grid selector toolbar to choose how many cameras to display simultaneously:
| Layout | Cameras | Best for |
|---|---|---|
| 1×1 | 1 | Full-screen focus on a single camera |
| 2×2 | 4 | Small deployments or a focused area |
| 3×3 | 9 | Mid-size deployments |
| 4×4 | 16 | Standard multi-camera monitoring |
| 5×5 | 25 | Large deployments |
| 6×6 | 36 | Maximum coverage overview |
Adding Cameras to the Grid
The left sidebar shows the Device Tree — a searchable list of all cameras organized by device group. To add a camera to the grid:
- Drag and drop a camera from the device tree onto any empty cell.
- Double-click a camera in the device tree to place it in the next empty cell.
- Right-click a grid cell to select a specific camera from a dropdown.
To remove a camera from a cell, right-click the cell and select Remove Camera, or drag another camera onto the same cell to replace it.
Streaming Modes
Kalytera delivers live streams using two technologies, selected automatically based on browser and camera capabilities:
- WebRTC (preferred): Ultra-low latency (~0.5–2 seconds). Uses peer-to-peer video delivery. Best for interactive monitoring and PTZ control.
- HLS (fallback): Higher latency (~5–10 seconds). Used when WebRTC is unavailable (browser limitation, incompatible camera profile). More universally compatible.
Right-click any camera cell to see which streaming mode is active (Info) and to force a switch between Main and Sub stream.
Saved Views
Save the current camera arrangement as a Saved View to restore it with a single click:
- Arrange cameras in the grid as desired.
- Click the Save View button in the toolbar (floppy disk icon).
- Enter a name for the view and click Save.
Saved views appear in the Saved Views panel at the top left. Click any saved view to instantly restore that camera layout. Views can be shared across operators — all users see the same saved views.
Fullscreen Mode
Double-click any camera cell to enter fullscreen mode for that camera. Press Esc or double-click again to return to the grid. Use fullscreen for detailed inspection of a specific camera stream.
PTZ Control
For PTZ (Pan-Tilt-Zoom) cameras, a control overlay appears when you click a camera cell in the grid. Use the on-screen directional buttons or scroll the mouse wheel to zoom in and out. PTZ control works best over WebRTC streams (lowest latency) — if your camera falls back to HLS, there will be noticeable delay between command and movement.
PTZ control requires the camera to support ONVIF PTZ or a native SDK. Check the camera's specifications if PTZ controls don't appear.
Tips and Best Practices
- Use the substream (lower resolution) when displaying many cameras in a large grid — it reduces server and network load significantly without losing useful monitoring detail.
- Create Saved Views for different shifts or monitoring scenarios (e.g., "Night Watch — Perimeter" vs. "Day — Entrance & Lobby").
- Use device groups (created in Setup → Devices) to organize cameras by location, building, or floor for easier navigation in the device tree.
- If a camera shows a spinner or blank cell, check Health Monitoring for the device's stream health score and recent error history.